
Home > Printing News and Printing Knowledge > Papercrafts: How to Make a beautiful 3D Paper Snowflake
Papercrafts: How to Make a beautiful 3D Paper Snowflake
Published Time:2015-12-08 Original Source:Papercrafts: How to Make a beautiful 3D Paper Snowflake
Papercrafts: How to Make a beautiful 3D Paper Snowflake
Three dimensional paper snowflakes look beautiful hanging in a window or on a wall. Fun for kids or adults, they are easy to make. Some like them for Christmas, but you may like them any time!
Below are the steps to show you how to make it step by step!
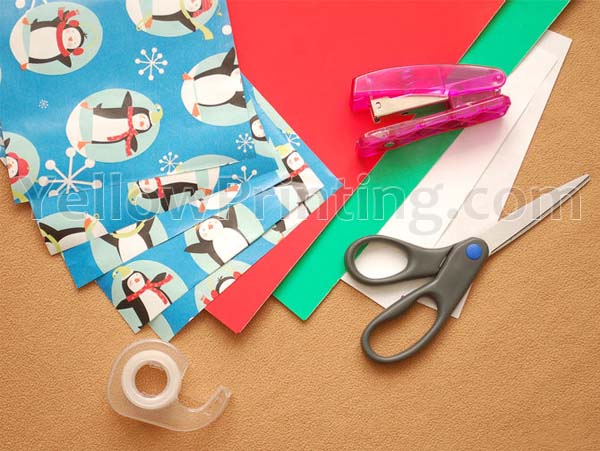
1. Gather materials. You'll need 6 (or seven for a fuller snowflake) pieces of paper (white copy paper will do, although you can use more elaborate types like const), scissors, clear tape and a stapler.
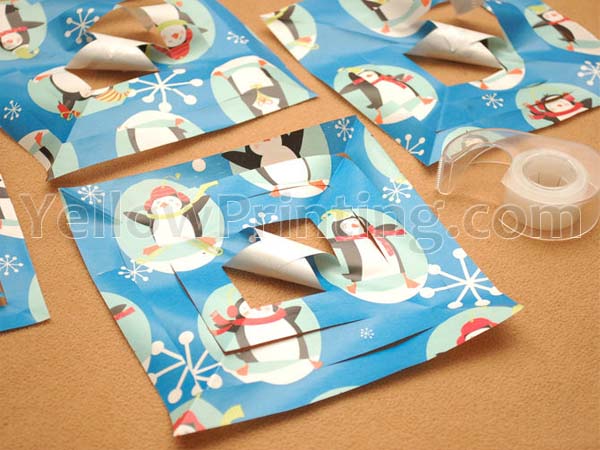
2. Fold each of the six pieces of paper in half, then diagonally. If the paper you are using does not make a perfect triangle, cut off the rectangular edge that sticks out and make it align perfectly. You should end up with a square folded into a triangle.
3. Fold the triangle in half, noting where the folded "bottom" of the triangle is.
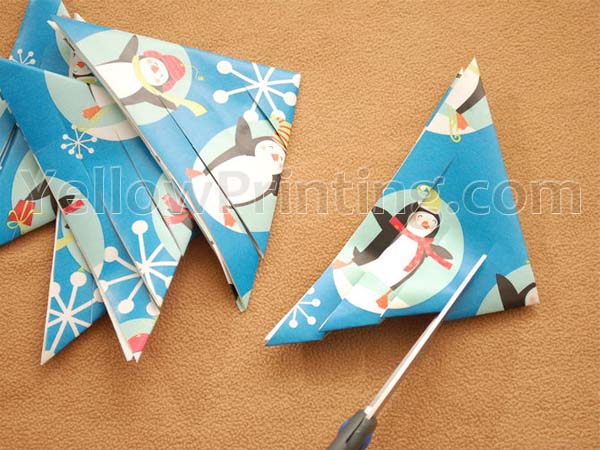
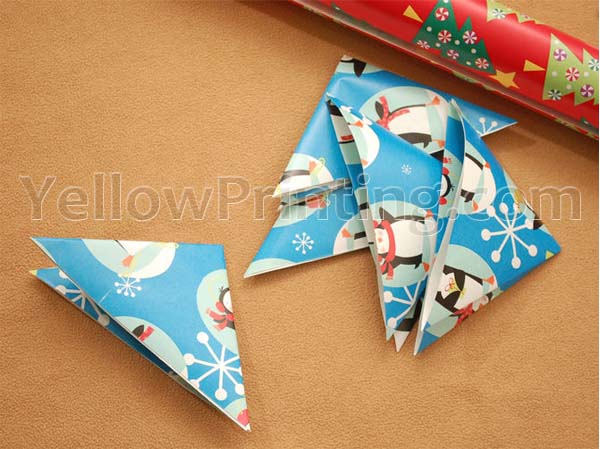
4. Cut three lines in the triangle. Position the scissors along the bottom fold, and parallel to one of the edges going up to the top (your cuts should be somewhat diagonal). Cut almost all the way up to the double folded crease, but not quite. Keep about the same distance between each cut. (This might not be suitable for thicker paper, since the number of layers makes it difficult to cut through.) When you unfold the triangle into a larger triangle, it should look like the photo at right.
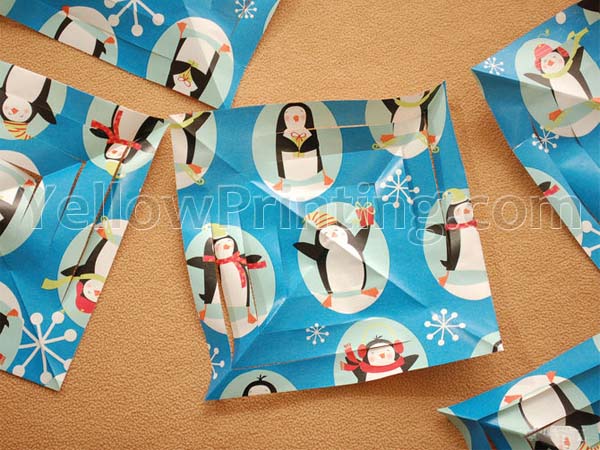
5. Unfold the triangle again. Turn it so that one of the points of the square faces you. It should look like the picture. YellowPrinting.com
6. Keeping your paper diamond side-up, roll the first two innermost paper lines together to form a tube. Tape these two pieces together. You should see triangle shapes on each side of the roll.
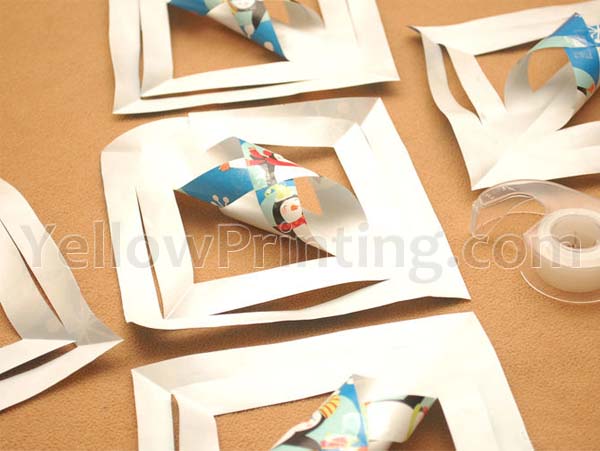
7. Turn the diamond over to the other side. Take the next two paper lines and pull them together on the opposite side of the tube and tape together as before. This will be a more rounded shape and wider than the first tube.
8. Keep turning the paper and joining the paper lines together on opposite side in the same fashion until all paper lines have been joined. Different kinds of Paper Products
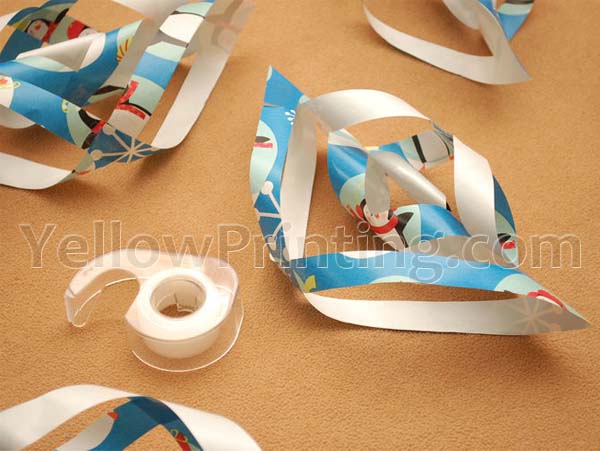
9. Repeat Steps 3 - 7 with the remaining 5 pieces of paper.
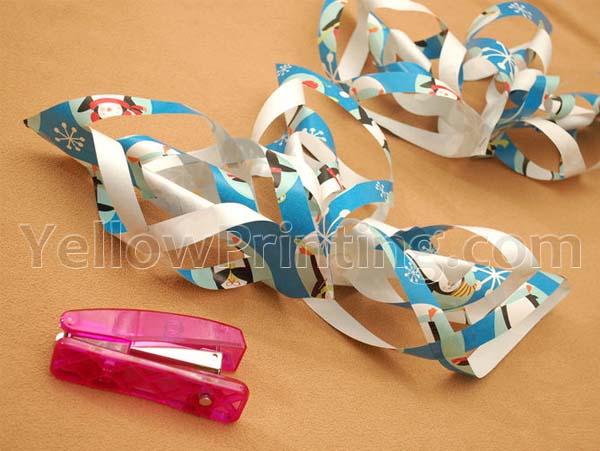
10. Join 3 of the completed rolled pieces together at one end and staple together using the other hand. Do the other 3 pieces the same way. Now you will have 2 pieces consisting of 3 strands or "arms" each. (For smaller snowflakes, it may be easier to use double-sided tape or white glue in place of staples.)
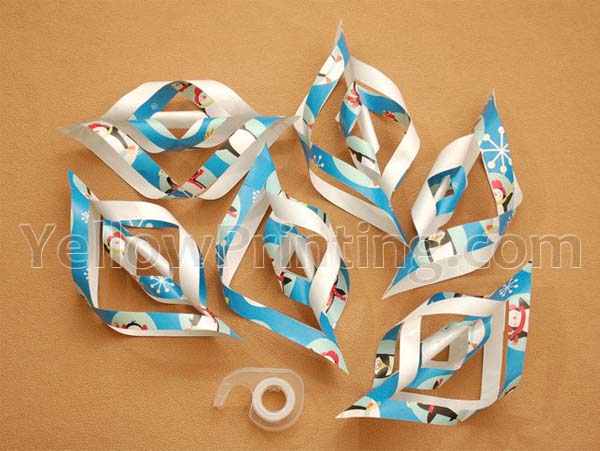
11. Staple the two new pieces together in the middle.
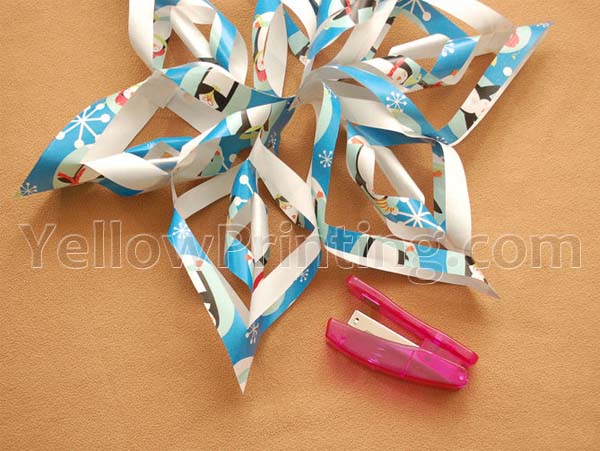
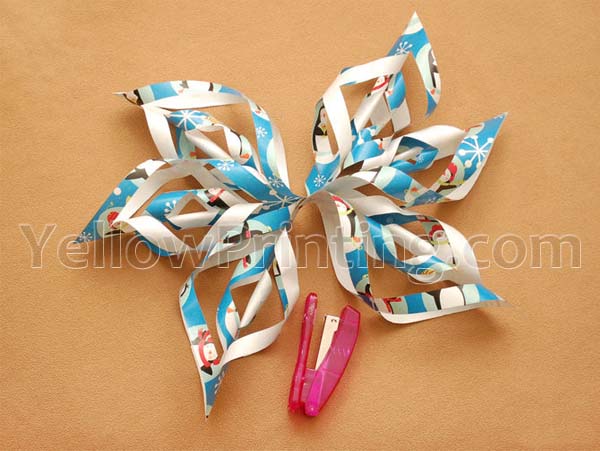
12. Staple where each of the six arms meet. This ensures that the snowflake shape is pulled into place. See picture at top for the finished snowflake.
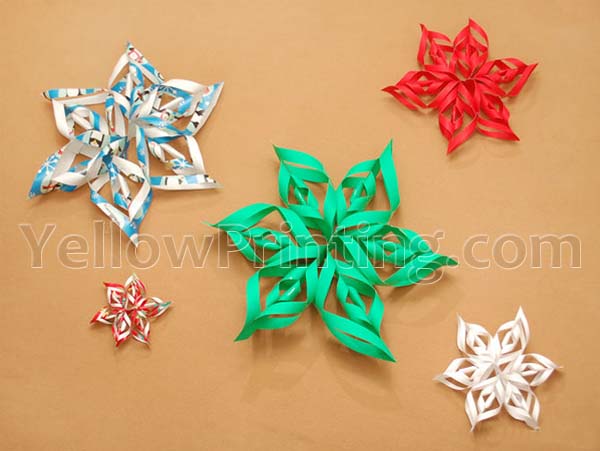
13. Hang them up, use them to make a center piece or use them to decorate in your own way as long as they can be admired.