
How To Make The Bleeding On Your Artwork ?
Published Time:2016-05-16 Original Source:How To Make The Bleeding On Your Artwork ?
Basic Knowledge for Printing
How To Make The Bleeding On Your Artwork ?
Bleed is a printing term that refers to printing that goes beyond the edge of the sheet after trimming. The bleed is the part on the side of your document that gives the printer that small amount of space to move around paper and design inconsistencies.
Bleeds in the USA generally are 1/8 of an inch from where the cut is to be made. Bleeds in the UK and Europe generally are 2 to 5mm from where the cut is to be made. This can vary from print company to print company. Some printers ask for specific sizes; most of these companies place the specific demands on their website.
YellowPrinting.com
Bleed information refers to elements outside the finished piece. Often a printer requires bleed information on pieces that have bleed to allow for “printer bounce” when cutting a job down to size. Failing to provide bleed information and crop marks can result in finished pieces showing a thin area of white on the edge.
Die-cuts sometimes require a 1/4″ bleed from where the page is intended to be cut; this is because of the possible movement of the paper during the die-cut procedure.
Full bleed is printing from one edge of the paper to the other without the standard borders by which most personal printers are limited. This is useful for printing brochures, posters, and other marketing materials. Often the paper is trimmed after printing to ensure the ink runs fully to the edge and does not stop short of it.
Setting Up Crops and Bleed YellowPrinting.com
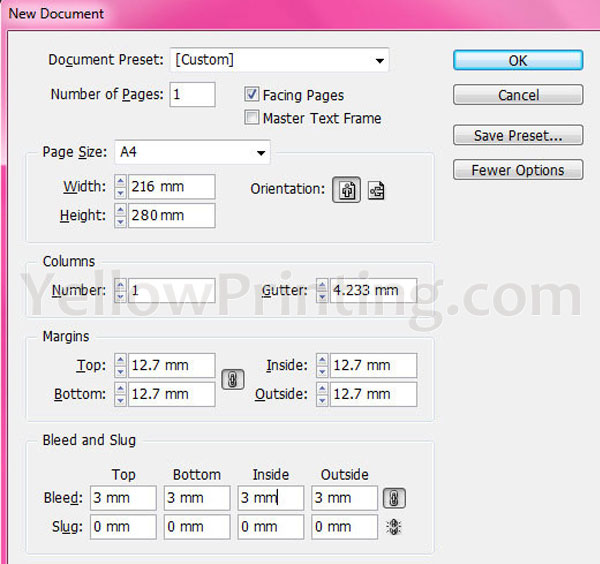
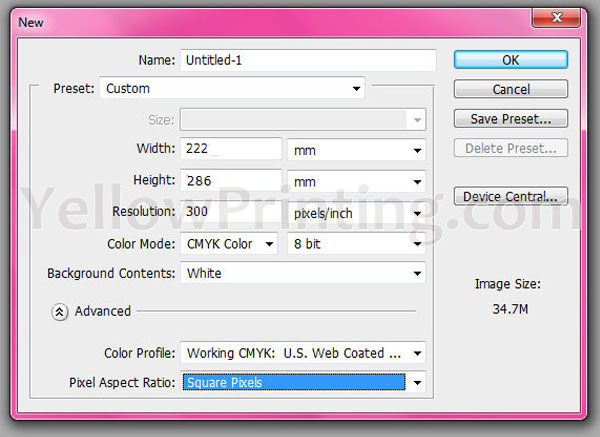
We will create an A4 paper, so with the bleed here's the document size.
A4 Paper = 216mm x 280mm
216mm + 6mm = 222mm
280mm + 6mm = 286mm
Total Document Size = 222mm x 286mm
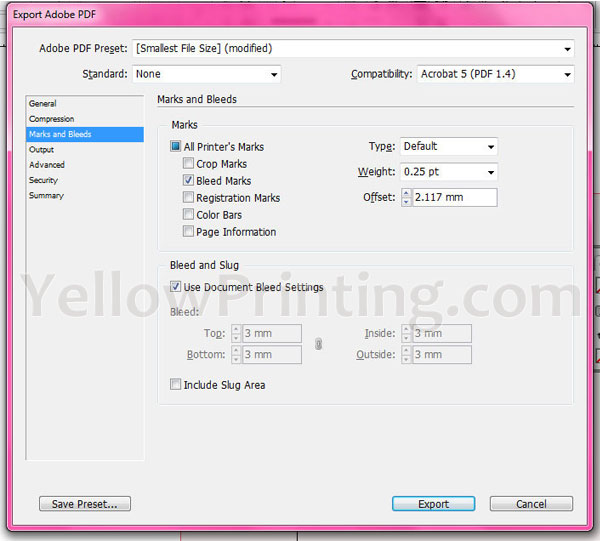
Setting Bleed in Illustrator/Photoshop/InDesign
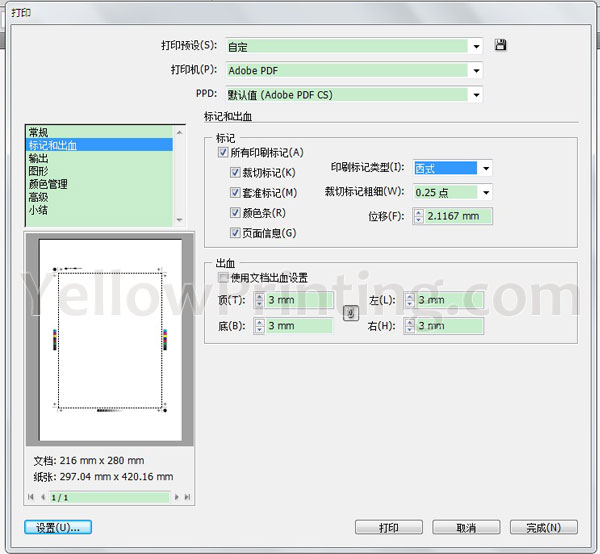
Choose File > Print.
Select Marks & Bleed on the left side of the Print dialog box.
Enter values for Top, Left, Bottom, and Right to specify the placement of the bleed marks. Click the link icon to make all the values the same.The maximum bleed you can set is 72 points; the minimum bleed is 0 points.